

A building or renovation project for your home can be exciting, especially for homeowners conversant with the process. Having an all in one project guide is crucial to the success of your renovation or building project. Careful planning is vital before beginning any project. This process includes determining what you will do and how to achieve your goals. It also involves acquiring materials and resources, following schedules, and documenting progress. Adopting a strategy that grants you more time while helping you avoid stumbling blocks ensures that your central vacuum install project is successful
A project planner is one of the best tools for people collaborating on all in one projects with other people. This tool helps you track your deadlines, tasks, and responsibilities. They also ensure that everybody involved in the project is well versed with your expectations and goals. A planner can eliminate any confusion, making the process smooth for everyone. Documenting the progress of your project is critical as it allows you to determine whether you are on course with the project and maintain motivation
If you notice that some changes are required, consider making modifications to increase the chances of success. You should also monitor and revise your project regularly to eliminate potential problems. To enable you to plan for and understand your home’s all in one project, here are steps your professional builder considers while building your home. You will also learn about the happenings at these core stages. It’s worth noting that a home construction project can vary from one region to another or builder to another, especially when constructing an intricate custom house. Always ask your builder to explain the specific procedures and policies
Prepare Your Building Site and Pour Foundation

Before a real estate development company starts working on your project, they should seek approval on the design and obtain permits from the local government. The licenses should cover the entire project, from grading and zoning the home construction, septic systems, plumbing, and electrical works. You can hire the same crew to execute site preparation and foundation works. However, this depends on the condition of your lot. Suppose the lot is wooded. You will need to hire an additional crew and machines like a bulldozer and a backhoe to clear it of trees, debris, and rocks. They can also dig to make way for your septic system. Once the lot is cleared, your crew will level the building site and lay wooden forms t act as an outline for your foundation. They will then dig trenches and holes.
Installation of Footings, Waterproofing, and Plumbing
Footings act as the ground reinforcement system. They are often formed using rebar and poured concrete to prevent the house from sinking. If you plan to dig a well, this is where you hire well drillers to execute the task. Suppose your home features a basement. Your builders will dig a hole, form, and pour the footings and foundation walls. The contractor will dig, shape, and pour the footings if your foundation is slab, and the space between the slabs will be leveled and equipped with utility components like electrical chases and plumbing drains. After pouring concrete into the trenches and holes, the contractor will allow it to cure. At that period, no activity will be ongoing on the site. Once the curing period elapses, your contractor will apply a waterproofing outline along the base walls. They will also fit in drains, water taps, sewer systems, and plumbing systems that should go to the first floor or basement slab. After this process, the contractor will fill the excavated dirt to the foundation area
Cost Breakdown, Timeline, and Inspection
Numerous factors can affect the cost of your foundation. These include the square footage, soil type, labor costs, and climate. The average foundation cost is approximately $8,385. Clearing the site and laying the foundation for the house is a critical and time-consuming step. Completing it may also take up to a month. After completing the curing process, an inspector will visit the site and ensure the components of the foundation are installed appropriately and adhere to the building codes in that region. The inspection process can be repeated based on the foundation type. At this point, your contractor will remove the forms and start coordinating the framing step.
Rough Framing, Cost Breakdown, and Timeline
The roof and floor systems, also called the skeleton or shell, are completed in this phase. The contractor then applies sheathing to the exterior walls before covering them using a protective wrap. Oriented strand or plywood board sheathing is enforced on the roof and exterior walls. The exterior doors and fiberglass windows are also installed in this phase. A protective barricade also called a house wrap, is then used to cover the sheathing. The house wrap blocks water from penetrating the structure. It also allows vapor to break out, reducing the danger of wood rot and mold risk. The median cost of framing a house ranges between $7 and $16 per square foot, labor inclusive. Prices can vary based on the house’s size, complexity, and availability of materials. Consult your contractor to get a precise estimate. Framing can take approximately one or even two months, based on the complexity and size of the house and the weather.
Total Electrical, Rough Plumbing, and HVAC
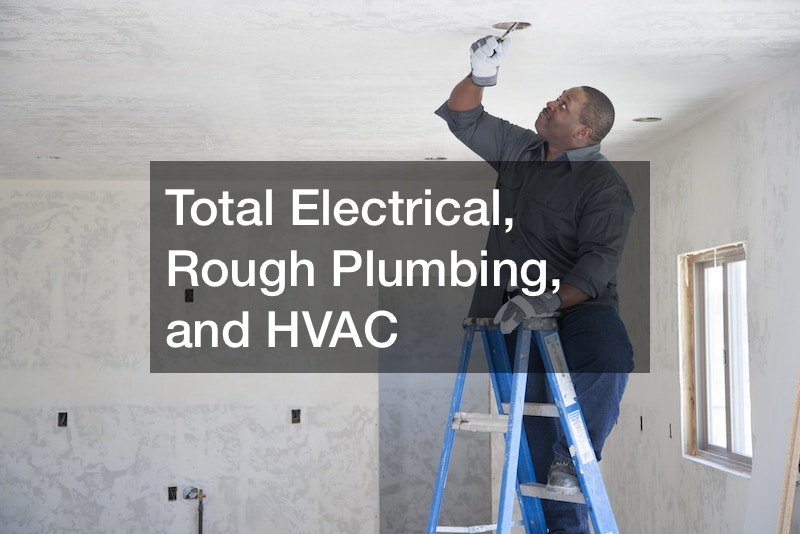
Various things like wires and pipes, water supply lines, sewer vents and lines, and electrical receptacles and wiring are installed in this phase. After the skeleton is complete, roofing and siding are installed. This is where a fire sprinkler system installation is done too. Plumbing and electrical contractors embark on running wires and pipes through the ceilings, interior walls, and floors. For every fixture, sewer vents and water supply pipes are also fitted. Single-piece shower units and bathtubs are installed during this phase of your project because there is sufficient room to move heavy and large objects around.
Ductwork and a furnace are installed for the HVAC system. Your electrical expert will manage the installation of HVAC release pipes across the roof. Insulation is established through the ceilings, walls, and floors. Once the roofing has been installed, the home is regarded dried in. at this point, an electrician installs holders for lights, outlets, switches, and pressure washer rentals before running wires from the distribution board to each holder. Music systems, cable television, and telephones are part of this work. Remember, plumbing and HVAC ducts are often fitted before the wiring because running wires around the ducts and pipes are easier than conversely.
Cost Breakdown, Timeline, and Inspections

The average cost of installing plumbing in the whole house ranges from $8,000 to $12,000, translating to $4.50 per square foot for an all in one project in a new building. Wiring a new home can range between $2,500 and $4,000, while the rough-in electrical cost starts from approximately $3,000 to $8,000 for a 1,000-square-foot home. The average price of installing an HVAC system complete with ductwork is around $6,820 to $12,350. However, add-ons can push this cost to between $13,000 and $17,000.
Installing HVAC can take approximately three to seven days, but other mechanical tasks like electrical and plumbing can take up to four weeks. Your electrician should not rush this phase of the all in one project because simple mistakes may prolong the inspection phase, stalling the construction. Mechanical, electrical, plumbing, and rough framing systems are usually inspected to ensure they comply with building standards and codes. Often, these inspections are done separately. At this phase, your contractor will deliver the drywall, gypsum board, wallboard, or plasterboard, and custom blinds to the construction sites.
Installing Insulation
Insulation is critical in developing a consistent and comfortable indoor climate. It also enhances your home’s energy efficiency. A core insulation component is its R-value or thermal performance, which demonstrates the material’s ability to resist heat transfer. Many houses are insulated on the floor above crawl spaces and unfinished basements, the attic, and all exterior walls. The standard insulation types used in many homes include cellulose, fiberglass, and foam. Based on the climate or region, your contractor can use mineral wool, also known as slag wool or rock wool, spray foam, concrete forms, structural insulated panels, rigid or foam board, or concrete blocks.
Blanket insulation, available in the form of rolls or batts, blow-in, and loose-fill (made of cellulose, or fiberglass), are new home insulation methods. If you choose liquid foam, your contractor will pour, inject foam, or spray it in place. Liquid foam is costlier than ordinary batt insulation. However, it has twice as much R-value for every inch. It can also fill the tiniest cavities, creating a functional barrier. Mineral wool, fiberglass rolls, and batts are often installed in crawl spaces, attics, basements, cathedral ceilings, floors, and walls. Manufacturers usually fix a facing like a foil kraft or kraft paper which acts as an air and vapor barrier. The batts often have specialized frame-resistant facing where the padding is left exposed, like basement walls.
Cost Breakdown and Timeline
Due to the vast range of location climates, home sizes, and insulation types, insulation costs vary highly. The average home insulation cost for a 2,000 square foot starts from approximately $3,000 to $10,000. But this cost can rise to $24,000, especially on an all in one project. Still, insulating new homes is cheaper because it’s added to unfinished ceilings and walls. An insulation project can take up to two weeks. Factors that influence the completion timelines are the size of the house and the type of insulation used. Insulating your house improves its curb appeal, especially if you plan on selling a home in the future.
Complete Interior Fixtures and Drywall, Cost, and Timeline
Here, your contractor starts creating the exterior finishes and building any additions, such as a dog house for pet owners. They also hung the drywall along the interior walls, taping them to ensure the joints between the boards are invisible. Drywall texturing, application of the first coat, and exterior finishes are also completed during this stage. Contractors start fitting in exterior finishes like siding, stone, stucco, and brick. The median drywall cost ranges from $1.50 to $3.00 per square foot. The price for each panel ranges from $60 to $90, including materials and labor.
The ceiling can be textured after the drywall installation, with costs ranging between $1.15 and $1.35 per square foot. Adding texture from scratch is cheaper than remodeling and retexturizing walls. The last step involves the application of the primer paint coat, which varies based on the finish. The median cost of painting a room ranges between $350 and $850. However, labor takes up a large chunk of this budget. For people who can afford it, this is an all in one project that can help you save money. The walls start taking shape once the framework is installed. This phase can take days and several weeks, based on the complexity and size of the house.
Driveway and Exterior Walkways Installation

This phase involves the installation of windowsills, door casings, baseboards, interior doors, and moldings before giving them one last layer of paint. Some of them are wallpapered appropriately. Further, on the exterior, the walkways, driveway, patios, and patio door are set up at this phase. Many contractors choose to wait for the completion of the all in one project to pour the driveway. That is because heavy machinery like drywall delivery trucks can destroy concrete. However, some contractors pour the driveway immediately after completing the foundation.
Cost Breakdown and Timeline
The average installation and material cost for interior doors is $738, labor inclusive. The average price of installing a windowsill is $221 to $341. Full decorative trim for the entire all in one project is approximately $1,000. Contractors often custom make these aspects, which can hugely influence your final cost. Installing walkways, driveways, and flooring can take up to two months.
A professional must inspect your new home regularly during your all in one project construction process. Apart from inspections for building code adherence, the contractor conducts daily quality checks at critical phases. The idea should be to attract numerous potential clients before the house is completed.